
Where and how do you even begin implementing BGP in an established production environment? First of all, I’ve been brainwashed by Ivan Pepelnjak’s blog into using BGP. If you search through his posts relating to BGP, it’s a clear choice (amongst competing protocols like OSPF or IS-IS) for scalability and flexibility for any data center where scalability is a concern.

So after reading Ivan’s relevant blog posts, assuming you are convinced that BGP is the way to go, how do you convince your colleagues, who are working in the same enterprise environment as yourself, and have little to no experience in implementing BGP in production networks, to consider using it in an ever-expanding DC network? My solution was to build a close replica of our routing environment in GNS3, with 24 routers, with even higher scale (more interfaces, larger routing table, etc.) than what we see in our production environment so far.
Download this GNS3 Topology here (also see full config at the bottom of this post)
As you saw in my last blog post, I am a HUGE fan of GNS3. Similar to last post, I used GNS3 again this time for proof of concept. This topology however is on a significantly larger scale (24 routers vs 13) and with significantly larger number of routes (~50 vs ~1000), with 900 loopbacks used to represent client networks in different VRFs, to replicate routing between three Data Centers. DC1 and DC2 are paired for high availability while DC3 is meant for staging and development.
To gain complete picture of the routing between the three DCs, they are even connected via a MPLS cloud simulating a MPLS service provider. As noted above, the main purpose of this particular GNS3 topology was to show how BGP can be utilized to exchange routes between DCs, both directly via a Data Center Interconnect (DCI) solution and over an MPLS cloud using your favourite MPLS service provider(s).
This topology serves as a proof of concept (PoC) and once BGP is implemented in production environment, this topology can continue to serve as a worry free test bed for testing and future routing related PoCs.
Here is a traceroute from DC2-AGG-A (top-left) to a loopback address on DC3-CORE-A (top-right) going through the MPLS cloud:
DC2-AGG-A#traceroute vrf 22-OZ 99.33.106.1
 1 99.22.11.1 56 msec 28 msec 20 msec
 2 99.22.1.10 96 msec 76 msec 68 msec
 3 99.22.10.21 96 msec 136 msec 96 msec
 4 172.16.21.1 [MPLS: Labels 27/205 Exp 0] 112 msec 120 msec 96 msec
 5 172.16.16.2 [MPLS: Labels 29/205 Exp 0] 76 msec 128 msec 112 msec
 6 99.33.20.32 [MPLS: Label 205 Exp 0] 96 msec 84 msec 72 msec
 7 99.33.20.20 84 msec 92 msec 116 msec
 8 99.33.2.2 144 msec 144 msec 116 msec
 9 99.33.3.1 148 msec 128 msec 140 msec
This traceroute shows traffic in between DC1 and DC2 over the DCI:
DC1-CORE-A#traceroute  vrf 2-MZ 99.2.11.1
 1 99.1.11.11 100 msec 120 msec 84 msec
 2 99.1.44.22 84 msec 68 msec 116 msec
 3 99.2.33.11 164 msec 164 msec 152 msec
 4 99.2.11.1 156 msec 276 msec 200 msec
And this traceroute shows traffic in between DC1 and DC2 over the MPLS cloud when DCI links between them are shut down:
DC1-CORE-A#traceroute  vrf 2-MZ 99.2.11.1
 1 99.1.1.10 104 msec 52 msec 4 msec
 2 99.1.10.11 40 msec 68 msec 84 msec
 3 172.16.11.1 [MPLS: Labels 21/37 Exp 0] 112 msec 120 msec 80 msec
 4 99.2.20.22 [MPLS: Label 37 Exp 0] 104 msec 84 msec 68 msec
 5 99.2.20.20 80 msec 88 msec 104 msec
 6 99.2.2.2 152 msec 140 msec 172 msec
 7 99.2.3.1 136 msec 156 msec 176 msec
Next steps? Manipulating BGP metrics to customize and route traffic as per requirements – with certain subnets over DCI and other subnets over the MPLS cloud, block certain subnets altogether, and other similar testing/customization.
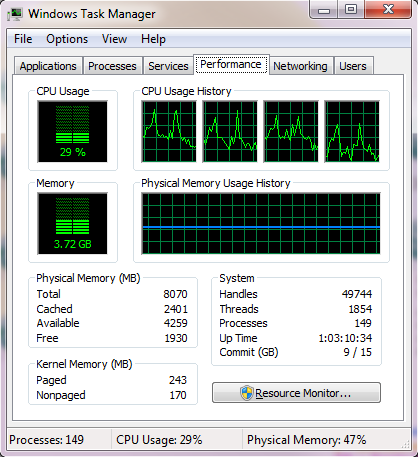
Also, in this topology, I utilized the same IOS image as in the previous topology, however, I reduced all the devices’ RAM from the default 256 mb to 128 mb. This allowed me to run this massive 24-router topology with under 4 gb of RAM utilized on my host PC. I would however recommend a relatively recent i5 or i7 (or equivalent) processor as CPU usage fluctuates quite a bit, and can be on the high side at times.
If you found this post useful or informative, please leave me a comment! 🙂
Update (2016-11-21) – Adding config below for easy access to individual router configs:
DC1
- dc1-agg-a_startup-config
- dc1-agg-b_startup-config
- dc1-ce-a_startup-config
- dc1-ce-b_startup-config
- dc1-core-a_startup-config
- dc1-core-b_startup-config
DC2
- dc2-agg-a_startup-config
- dc2-agg-b_startup-config
- dc2-ce-a_startup-config
- dc2-ce-b_startup-config
- dc2-core-a_startup-config
- dc2-core-b_startup-config
DC3
ISP
- isp-ce-1a_startup-config
- isp-ce-1b_startup-config
- isp-ce-2a_startup-config
- isp-ce-2b_startup-config
- isp-ce-3a_startup-config
- isp-ce-3b_startup-config
- isp-pe-a_startup-config
- isp-pe-b_startup-config

Leave a comment