How can you get promoted? One would assume that your performance at your work would be the biggest factor. It turns, it’s not. It’s not even 50% of the factor. It’s only 10%!
Based on research and studies by a number of independent scholars, it turns out that your image, i.e. how you are perceived plays a 30% role in you getting promoted, and your exposure, how many people know about your and your work, plays a 60% role in getting promoted and hired. Isn’t that insane!?
What does this practically mean?
Working hard and doing good work is important (Performance)
Having a blog is important (Exposure)
Networking is important (Exposure)
Discussing ideas with people within and outside your community is important (Image)
Showcasing your work is important (Image)
Performance is the foundation, and without that 10%, you won’t be ablet o get the other 90%, but, it also gives you an idea of how much time and effort you have to spend building your image, networking, and working on exposure. This blog itself, which at the time of writing is 12 years old, is an example of exposure.
So, what are you waiting for? Start posting on LinkedIn and other places regularly and make sure to blog about all the interesting things you are working on. Your success depends on it!
Working with an example, in this video, we talk about in detail how to supercharge your résumé. Anywhere from 100 to 1000 or more people apply to every single job. How do you stand out? The answer is actually very simple: you make sure that you have the same words that are in the job description in your résumé as well. In this video I go through an example resume. Links shared in the video: https://linktr.ee/acetheinterview
In addition to making your résumé machine, friendly, I also provide tips on how to make your résumé human friendly as well, so that when your résumé actually does get shortlisted, it is impressive and is selected to be called and interviewed.
If you’re like me and looking for ethical alternatives to the big tech AI services, you’re going to love this. Thaura.AI is an amazing alternative that respects your privacy and doesn’t sell your data to corporations.
Why Thaura AI?
Before we dive into the setup, let me tell you why Thaura AI is awesome:
Privacy-first: Your data stays yours – no selling to big tech companies
Ethical AI: Built with responsible AI principles in mind
Compatible: Works seamlessly with tools like Cursor that support OpenAI-compatible APIs
Pre-Step: Get Your Thaura API Key
First things first, you need to get your API key from Thaura:
Go to Thaura.AI and create an account if you haven’t already
Navigate to your dashboard and find the API key section
Copy your API key – you’ll need this for the next steps
Step 1: Open Cursor Settings
Once you have your API key ready, open Cursor and let’s get started:
Open Cursor IDE
Go to Settings (you can use Cmd+, on Mac or Ctrl+, on Windows/Linux)
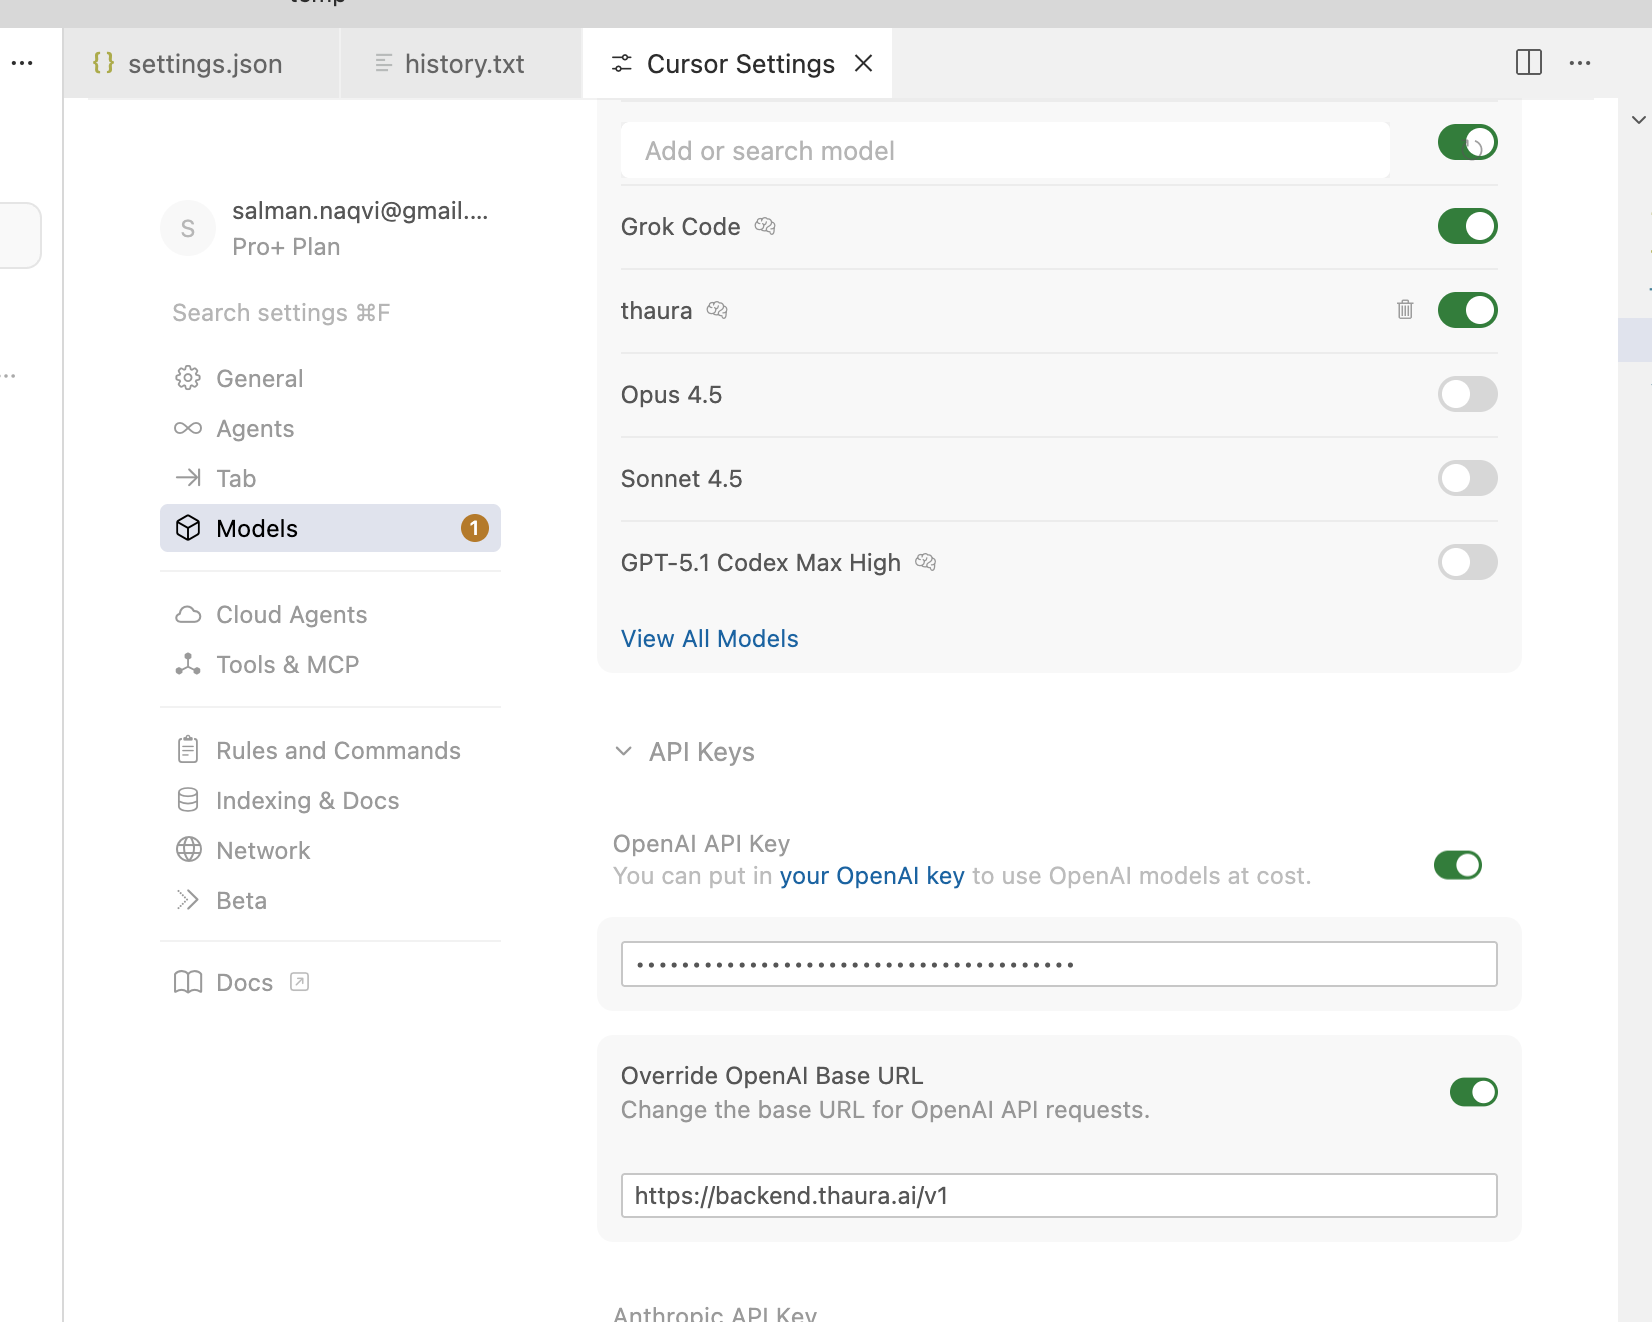
Look for the API Keys section under the OpenAI settings
Step 2: Add Your Thaura API Key
This is where the magic happens! Since Thaura AI uses an OpenAI-compatible API, you can add it right in the same section:
In the OpenAI API Key section, paste your Thaura API key
Make sure the base URL is set to https://backend.thaura.ai/v1 (this is important!)
Save the settings
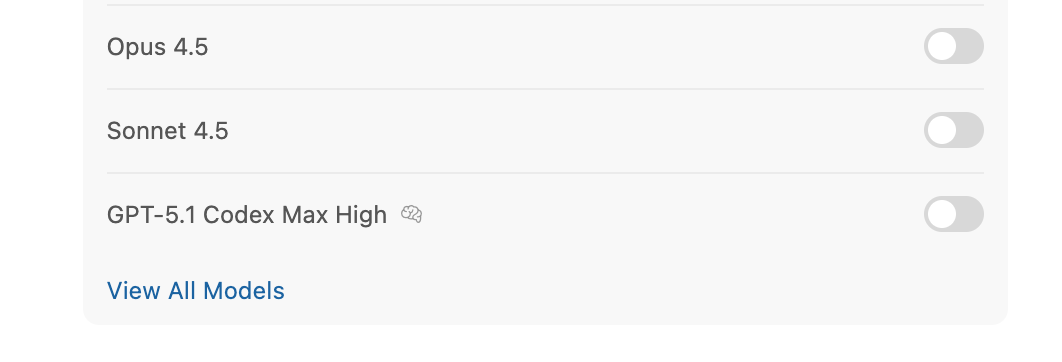
Step 3: View All Models
Now let’s add the Thaura model to your available options:
Go back to the main settings
Look for Models or Model Settings
Click on “View All Models”
Step 4: Add Custom Model
Time to add Thaura as a custom model:
Click on “Add Custom Model”
You’ll see a dialog box asking for the model name
Type thaura (all lowercase, no quotes) in the model name field
Click “Add” to save it
Step 5: RESTART CURSOR
I can’t stress this enough – you MUST restart Cursor for the changes to take effect. This is a common step that people often forget, but it’s crucial for the new model to be recognized.
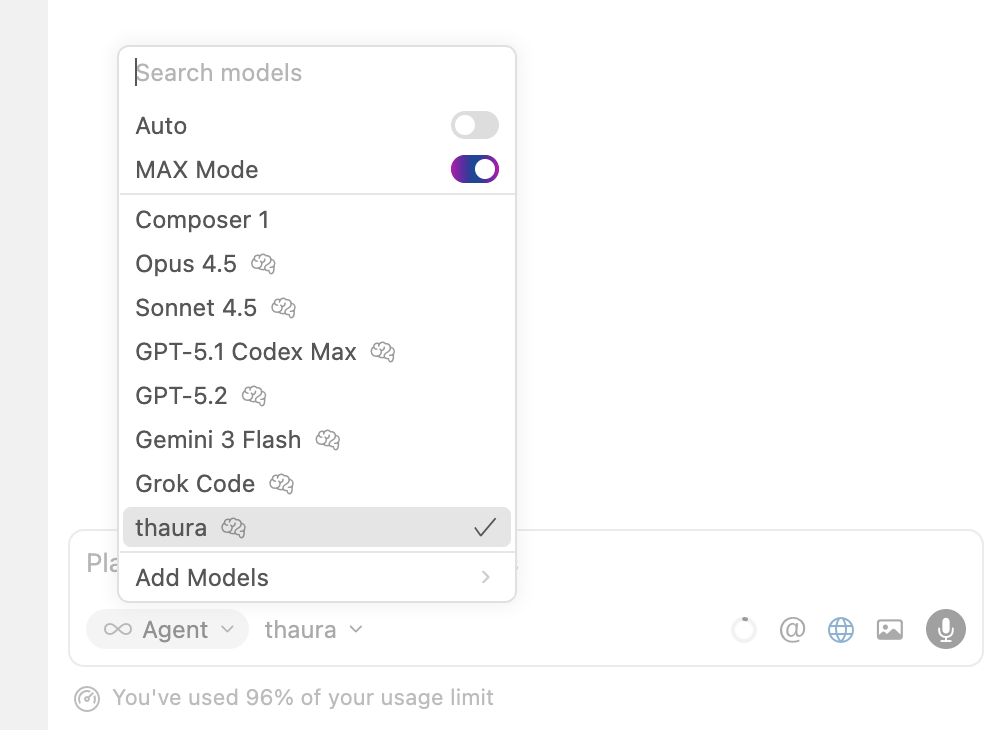
Step 6: Start a new chat using “New Agent” button
Now for the fun part! Let’s create a new agent using Thaura:
Click on “New Agent” in Cursor
When the model selection appears, choose “thaura” from the list
Give your agent a name if you want (optional)
Create the agent
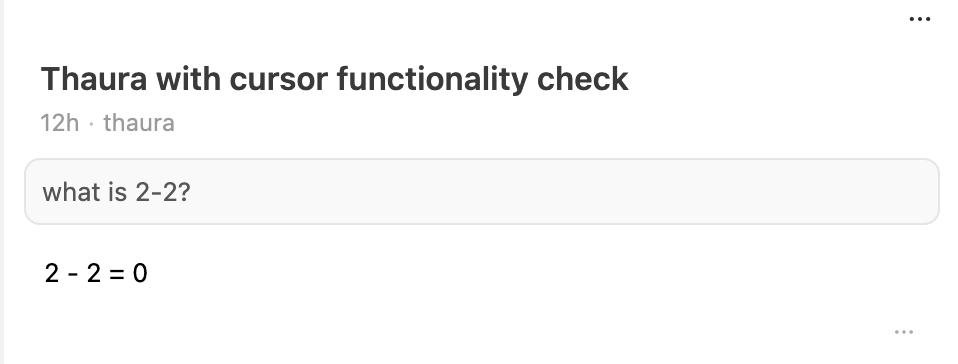
Step 7: Test Your New Thaura Agent
Let’s give it a test run to make sure everything works:
Open any file or create a new one
Type a test prompt like:Can you help me write a simple JavaScript function that adds two numbers?
Hit Enter and watch Thaura AI in action!
Setting up Thaura AI with Cursor is super easy and totally worth it. You get all the benefits of AI coding assistance without the privacy concerns that come with big tech services. Plus, you’re supporting ethical AI development!
Give it a try and let me know how it works for you. Happy coding!
Same steps as above, but showing screenshots (Cursor change UI often so this might look a little different within a few months).
What if you could track how green your city really is? The Greenspace Detection App brings satellite imagery analysis right to your desktop, turning complex data into actionable insights about urban vegetation. This powerful tool automatically downloads and processes satellite imagery from cities worldwide, removing clouds and using advanced NDVI calculations to identify and visualize vegetation with remarkable accuracy. Whether you’re an urban planner, environmental researcher, or just curious about your city’s green cover, this app makes sophisticated environmental analysis accessible to everyone.
The magic happens through a scientifically rigorous approach that processes Sentinel-2 satellite imagery at 10-meter resolution, filtering out clouds and shadows to focus on what matters most – vegetation. Using the NDVI formula (NIR – Red) / (NIR + Red), the app categorizes vegetation into density levels from subtle growth to dense forests. What makes this particularly powerful is the temporal analysis feature, which compares annual vegetation patterns by selecting the best low-cloud scenes each month, then averaging the results to give you comprehensive insights into how your city’s green spaces are changing over time.
Beyond just pretty maps, this desktop application delivers real analytics that can drive meaningful environmental decision-making. With 50+ cities already mapped and predefined boundaries, you can instantly explore vegetation coverage statistics, track changes between years, and identify areas gaining or losing green space. The app handles all the complex satellite processing in the background while providing live progress updates, so you get scientific-grade environmental intelligence without needing to be a remote sensing expert. It’s democratizing environmental data analysis, one city at a time.
If you’ve ever wanted to build a secure, collaborative platform for handling large sets of community documents, community.haqnow is a solid starting point. It’s designed to support bulk uploads, OCR + translation, powerful search, AI-driven Q&A, and team collaboration—all the things you’d want if you’re managing big collections of documents across languages and formats. Think of it as the infrastructure backbone that makes knowledge-sharing easier and more transparent.
Under the hood, this repo comes with all the tooling you need to spin things up quickly. It uses Terraform IaC for Exoscale, helper scripts for deployment, and a Makefile to keep repetitive tasks clean and simple. Deployment is modeled after the main HaqNow platform, so you can bootstrap a server, drop in your app code, and get a working backend/frontend without a headache. Secrets are kept safe in .env files (never committed), while database access is tightly restricted down to your VM’s IP—so you’re not just fast, you’re secure by default.
The architecture itself is straightforward but flexible: a Compute VM running Ubuntu and nginx serves your static site and API endpoints, while Exoscale’s DBaaS handles both MySQL and Postgres needs. Object storage via S3 powers your document buckets, making files easily accessible while keeping the rest of your setup clean and modular. In short, community.haqnow gives you a strong foundation for any project that needs reliable infrastructure for community-driven knowledge sharing.
Big news — we’re getting ready to launch HaqNow.com, a global platform built to shine a light on corruption, wherever it hides. The name “Haq” comes from Arabic, meaning “truth” or “right,” and that’s exactly what we’re about. Anyone — whether you’re a journalist, activist, or just a concerned citizen — can anonymously upload documents in over 60 languages, with instant English translation so the whole world can read and understand. Privacy comes first, and we’ve designed the platform so people can share critical information without risking their safety.
But here’s where it gets even more exciting — we’re introducing a brand-new AI-powered Q&A system that can actually answer questions about the corruption documents on the platform. Wondering “What corruption cases involve Brazil?” or “What types of government fraud are mentioned?” Just ask in plain language and get detailed answers, complete with clickable sources and a confidence score so you know how reliable the response is. And the best part? It’s 100% powered by open-source tech and runs locally for maximum privacy — no big corporate AI peeking at your data.
We’ve packed a lot of innovation into the system: a dual database setup for speed and accuracy, cutting-edge language models from Ollama and sentence-transformers, and smart search capabilities that work across thousands of documents in seconds. Everything from upload to answer generation is designed to make finding the truth faster, easier, and safer. HaqNow is more than a website — it’s a tool for global transparency. We can’t wait to open the doors and see how people around the world will use it to hold power to account.
Ever wondered how to uncover hidden patches of greenery in your city without wrestling with API keys or complex satellite data pipelines? That’s exactly what the greenspace-detection-platform is all about. Born from a clever mix of Next.js, Python, STAC, and Sentinel-2 satellite data (via the Microsoft Planetary Computer), this tool delivers beautifully aligned, key-free vegetation analysis, boosting detection by a whopping 46% compared to standard methods GitHub.
What’s particularly fun is how it brings everything to life: you pick your city (Toronto’s even on the list!), tweak sensitivity and date range, and watch the platform render a purple-gradient map showing dense forests, parkland, grass, and subtle green hints—all geo-aligned to sub-pixel accuracy and ready to toggle between grayscale, OSM, or satellite views GitHub. Under the hood, sub-pixel precision and smart CRS transformations ensure images align perfectly, while Leaflet, OpenCV, and Rasterio stitch it all together in the frontend and backend.
Whether you’re a hackathon pro or just curious about urban ecology, this is a seriously cool project to play with—or build on. Installation is a breeze with npm install, npm run setup, and then launch with npm run devGitHub. You’ll be inspecting greenness in your favorite city in just a few clicks—perfect for anyone with an eye for code and a soft spot for nature.
Batch Your City Data with Ease – made using Cursor AI!
My team is using Veraset’s mobile ping data to help city administrators improve quality of life in their cities. This tool, https://github.com/main-salman/mobility-data-lifecycle-manager, let’s you manage the download of data from Veraset (if you are their customer and have an API key from them).
This open-source tool lets you:
Select cities and areas of interest (AOI) via a slick web UI
Schedule or manually trigger batch data syncs from Veraset
Run multiple API endpoints in parallel (think: pings, trips, cohort, aggregate, and more)
Organize everything by country, state, and city in your S3 bucket
Monitor progress and logs in real time
It’s built for researchers, analysts, and data engineers who want to automate and scale their mobility data workflows—no more manual downloads or one-off scripts.
A record for example.org pointing to your EC2 instance’s public IP
MX records for email routing
SPF, DKIM, and DMARC records for email authentication
Any other required records for your services
Best Practices
Keep a backup of your DNS records
Document all changes.
Set up DNS monitoring in AWS Route 53
Consider setting up DNS failover if needed
Use AWS Route 53’s health checks for your services
Cost Considerations
AWS Route 53 charges:
$0.50 per hosted zone per month
$0.40 per million queries for the first billion queries
Additional costs for health checks and routing policies
Security Considerations
Enable AWS CloudTrail to log all Route 53 API calls
Use IAM roles and policies to restrict access to Route 53
Consider enabling DNSSEC for additional security
Monitoring and Maintenance
Set up CloudWatch alarms for DNS health
Regularly review DNS records
Keep track of DNS changes in your history.txt
Monitor DNS propagation times
Would you like me to provide more detailed information about any of these steps or help you with setting up specific DNS records for your email server?
Easiest way to install MCP Servers/Agents in Cursor.
What’s an MCP Server? 🤔
Think of MCP servers as your AI assistant’s superpowers. They’re like plugins that give your Cursor IDE extra abilities – from running Docker containers to searching the web, all without leaving your editor.